October 23, 2018
When Are Hop Cones Ready to Harvest?
To Harvest Hops, or Not To Harvest Hops?
If you're like me, you get tingles when you think about hop harvest season. Like a helicopter parent, you've coddled your backyard hop bines since they were babies, tending to them religiously and watching proudly as they've grown over the summer to be 16, 18, perhaps more than 20 feet tall! And now you're staring at their beautiful cones, just waiting to be lovingly bombed into that IPA recipe you've been itching to brew. The time is now! you think to yourself.
But hold your horses there, hophead! Are you sure they're ready?
Unless you enjoy the flavor of raw chlorophyll in your hoppy homegrown brew, you should probably pause and follow a simple regimen of “Look, Listen, and Learn” to make sure that your hops are indeed ready for harvest.
Look at Your Hop Cones.
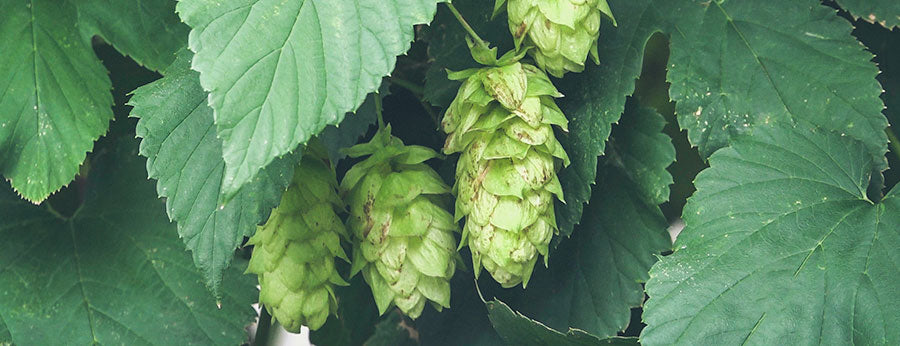
Observe their bracts, the leaf-like sections that form the body of the hop cone. Earlier in the season, the bracts will appear bright green and tightly bound. As peak harvest season approaches, they will begin to appear a lighter yellow-green, and the bracts may begin to look as if they are “relaxing”, clinging less tightly to the cone.
Listen to Your Hops.
No, I don’t mean put them up to your ear and wait for them to tell you that they’re ready! Think about it: how do hops first communicate to you through your favorite IPA? Through their aroma! Pinch the pointy end of the cone between your fingers and “unzip” the cone into two halves, or just rub them between your fingers. Now inhale. Like what you smell? Then they’re probably telling you they’re just about ready! They should smell bright and, well, hoppy; immature cones will smell “green”, like any old plant.
Pro tip: if you’re not sure what your particular hop variety should smell like, do a little research and find a “reference beer” that uses that variety as the main aroma hop.
Learn About Your Hops Cones.
They look right and they smell right, but are they just right? Just as you use gravity readings to learn about your beer, you can use the “percent dry matter” of a cone sample to learn about your hops.
- Grab a plastic colander and a digital scale.
- Put the colander on the scale; record the weight.
- Bring the colander out to your hopyard and pick a sample from a single variety, being sure to pick a few cones from each section of the bine. (I usually like to pick about 30 grams or around 1 ounce).
- Once you’ve picked enough cones, put your colander full of hops on the scale; record the total weight, then subtract the weight of the colander. This is your Green Cone Weight.
- Keeping the cones in the colander, put them in the microwave on high for about 10 minutes, lightly fluffing them every 30-60 seconds to ensure even drying. (Do not scorch them!) When you can easily bend and snap the strig - the center spindle of the cone - between your thumb and forefinger, they are completely dried.
- Again, record the total weight, then subtract the weight of the colander. This is your Dry Cone Weight.
When Should I Pick My Hop Cones?
Dry Cone Weight Formula
Have a beer handy? You’ll need it; I’m about to drop some math on you:>
Hop percent dry matter = 100 x (Dry cone weight ÷ Green cone weight)
A good general target is 23% dry matter.
If my green cones weighed 30 grams and my dry cones weigh 7 grams, then
100 x (7 ÷ 30), or 100 x (.23) = 23, which means
Hop percent dry matter = 23 = perfect!
Once you have reached about 23% dry matter, the waiting game is over: you may now harvest your cones and make all your hoppiest dreams come true!
-Ian Campbell
Watch Harvesting Homegrown Hops Video:
Order Hop Rhizomes today >
Read More About Growing Hops:
How to Grow Hops - Our step-by-step guide
Growing Hops - Diary of first-time hop grower
Growing a Hop Garden - A family's history of growing hops and 'how-to'
Harvesting Hops - A guide on what to do during harvest
